The user manual of
Smart Shopping Cart

Please read this User Manual carefully before using the smart shopping cart!
CONTENTS
- Basic Information....................................................................................................................... 2
- Notes on Safety......................................................................................................................... 3
- Device overview........................................................................................................................ 5
- Getting started........................................................................................................................... 7
- Description of control panel………......................................................................................... 8
- Using the smart shopping cart.............................................................................................. 9
- Understanding the system notations………………................................................................ 11
- Maintenance and Cleaning.................................................................................................... 13
- Web application guide……………………………………………………………………………………………… 14
Basic Information
The amount of time it requires to receive the bill is the major problem with shopping. By incorporating a smart shopping cart into your supermarket, customers can shop faster and save time without having to wait in line to pay their bills. Let clients enjoy their purchasing experience using the smart shopping cart.
This system consists of:
- Cart
- Mobile application : Developed for customers
- Web application : Developed for supermarket administration
Use !
- The machine should only be used after the instructions below have been read carefully.
- The machine should not be operated by children or anyone who has not read the instructions.
- Don't add your personal things to carts.
Notes on safety
Safety measures for Customers:
- Read the instruction before using the shopping cart
- Don’t put children inside the cart’s basket.
- This product can be used by children aged from 12 years and above and persons with reduced physical, sensory or mental capabilities or lack of experience and knowledge if they have been given supervision or instructions concerning use of the device in a safe way and understand the hazards involved. Children shall not play with the device. Cleaning and user maintenance shall not be made by children even with supervision.
- Children of less than 3 years should be kept away unless continuously supervised.
- This product is intended to be operated in restricted areas. Which will be defined by business owners.
- Protect the cart from falling down and any protection falls in the control system
- If the Red indicator is up, contact the staff in the shop and stop shopping.
- Make sure your online payment system is able to be used.
- Do not put animals, such as pets into the device.
Safety measures for Shop Owners:
- Battery Level: Don't allow a cart Whose battery level is too low. It will damage the lifetime of the battery. Be careful when you charge the cart for overcharging.
- Must ensure that the network connection of the smart shopping cart is good before customers use it.
- When transporting the smart Shopping cart turn off the cart and don't add weight to the cart
- Never attempt to operate the device if it is damaged, malfunctioning, partially disassembled, or has missing or broken parts. Such devices should be inactive and taken offline immediately.
- Do not attempt to separate any panels or disassemble the appliance.
- Do not apply any sharp objects to the touch screen in order to operate the device.
- If the cart’s battery is damaged, it must be replaced by the manufacturer, its service agent, authorized staff or similarly qualified person in order to avoid hazard.
Charging Safety:
- Do not modify the power plug provided with the product. If it does not fit the outlet, please talk with the manufacturer and replace the defect power plug, or have a proper outlet installed by a qualified electrician.
- Do not use other power adapters to charge the device except the ones provided with the product.
- Do not try to move the device while charging. Make sure all charging cables are disconnected before anyone attempts to take the device out of its charging area.
- No customers are allowed to step into the device’s charging area.
- Do not remove or insert the battery while the device is still charging.
- Do not plug or unplug the charging cable while the device is powered on.
- Do not unplug the device by pulling on the power cable. Always grip the power cable firmly and pull straight out from the socket outlet.
Device overview
Keypad:
To make a confirmation about the product adding and removal and you
can give inputs when the system asks you to give any inputs.
LCD Display:
LCD display shows the messages and instructions for users.and gives alerts when any errors occur.
LED lights:
Yellow: The cart is ready to use and no one is connected to the cart.
Green: It will be activated when the user is connected to the cart. Indicates that there is no error on the systems and shopping
Red: It will be activated when there is an error on the cart or any shopping method.
Buzzer:
It will be activated when there is any unusual activity detected on the cart.
Barcode reader:
Used to scan barcodes in products and staff use when you like to purchase an
Item or need to remove an item from the cart.
Camera:
The camera records the activities in the shopping cart and it will help to check
items placed inside the cart are scanned.
Ultrasonic sensor:
Smart shopping carts use 2 ultrasonic sensors to detect the objects added and
removed from the cart.
Load cell:
The load cell is used to check the weight of the product which is added to the
cart.
Getting Started
Before using a Smart shopping cart:
- Install the smart shopping cart mobile application
- Create an account with your mail address and other details
In the shopping mall:
- Open your mobile application there is an option called QR code and use that option to scan the QR code that is placed on the smart shopping cart. After the connection LCD turns on and LED switches to green.
- Now the cart and your mobile application sync and display on the cart show your user name.
- Now it's ready to start shopping.
Description of the control panel
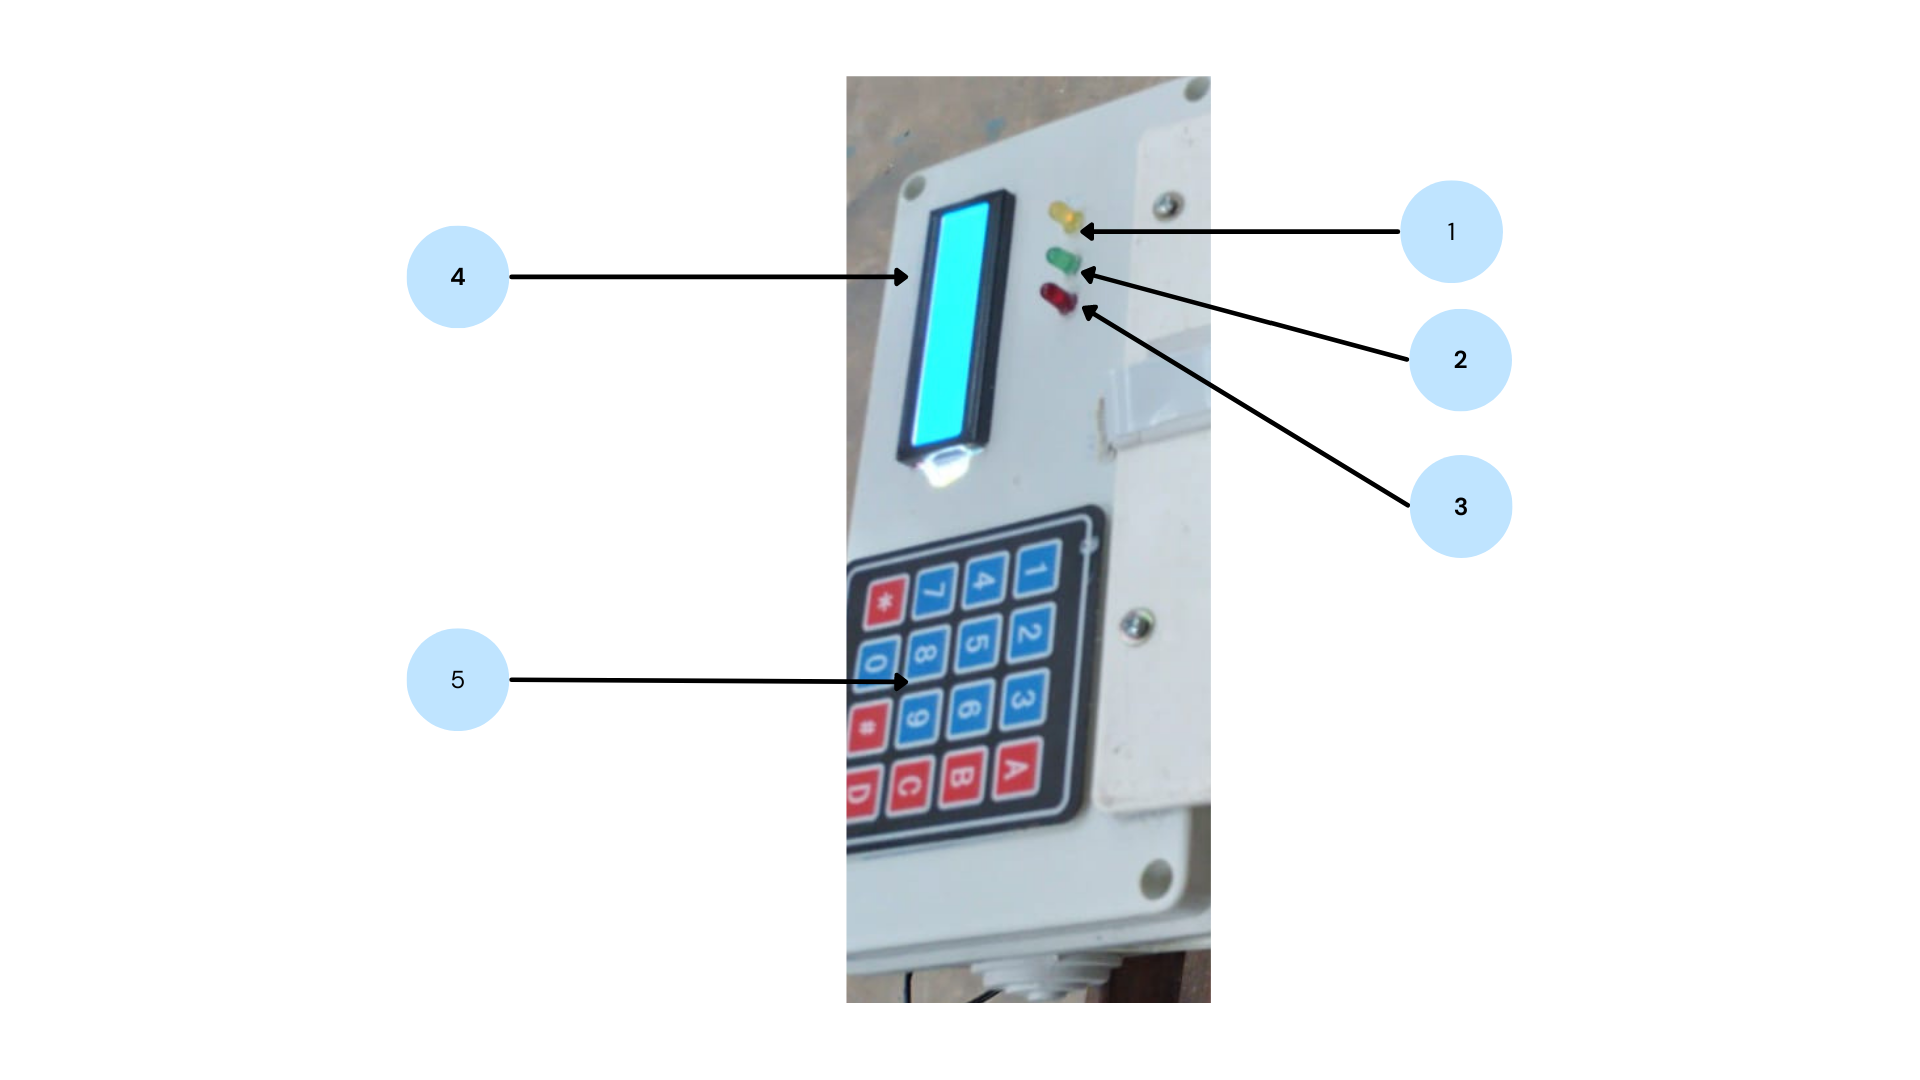
1 | Yellow LED |
2 | Green LED |
3 | Red LED |
4 | LCD Screen |
5 | Keypad |
Using the cart for shopping
Start shopping:
- Shopper taps on “Start Shopping!” Button
- Shoppers must scan the QR code attached to the cart and then they can start the shopping.
Adding an item to the cart:
- Shopper takes any item and scans the barcode printed on it using the barcode scanner attached in the cart.
- Then they can put it into the cart. When they added the scanned item it will be added to the virtual shopping cart list in the mobile application, also it will be displayed on LCD screen and green led will light up.
- If they want to add more than one same item, then they have to scan all of them.
- Shoppers can continue adding items.
Removing an item from the cart:
- Shoppers can directly pick an item from the cart.
- Cart will use its computer vision and weight logic to confirm removal of the item.
- Shoppers will be prompted to scan the barcode.
- Items will be automatically removed from the shopping list and displayed in the mobile application and LCD.
- Shopper is then directed to remove all items from the cart. When all items are removed, the transaction will end.
Checking Out :
- When shopper is done shopping, shopper taps “Checkout”
- Shoppers are directed to make their way to the checkout area.
- Shopper taps “Pay for Cart”
- Shopper confirms prices and taps “Pay Rs __.”
Understanding the system notations
Messages displayed on LCD:
User connected to the cart successfully.
- “You scanned ITEM_NAME” :
Displays the item that the user scanned.
- “Please scan item you removed”:
Customers should scan items they removed from the cart.
- “Please put item scanned item inside the cart”:
Displays when the user hasn't added a scanned item inside the cart.
- “Please remove the unnecessary item”:
Displays when a user puts an item non supermarket items, they must remove it from the cart.
- “Please go for manual checkout”:
Displays when the system detects that items are added to the cart without scanning.
Led :
Yellow: The cart is ready to use and no one is connected to the cart.
Green: It will be activated when the user is connected to the cart. Indicates that there is no error on the systems and shopping
Red: It will be activated when there is an error on the cart or any shopping method.
Buzzer:
It will be activated when there is any unusual activity detected on the cart.
Maintenance and Cleaning
- Disconnect the device from the power supply (power cable and battery) before cleaning the device. Turning off the switch does not disconnect the device from the power supply.
- Do not repair or replace any part of the device. All repairs and servicing must be performed by qualified service personnel unless specifically recommended in this User’s Manual.
- Use only authorized factory parts or tools for maintenance. • Do not spray water inside or outside the device to clean it.
- Do not let customers to clean the device.
- All cleaning processes should be conducted by employees following the cleaning SOP.
Web Application
A web application is developed for administrators and employees. Using web apps, an administrator can control all items and manage smart shopping carts, and employee information.
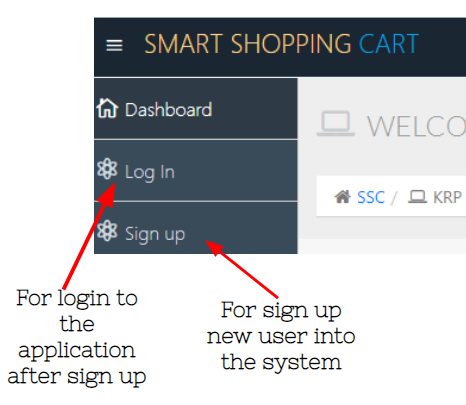
When the shop is registered through our web application the admin section is also created. After that staff can create an account for them and the admin must verify that account. A user's roles can be specified by an administrator.
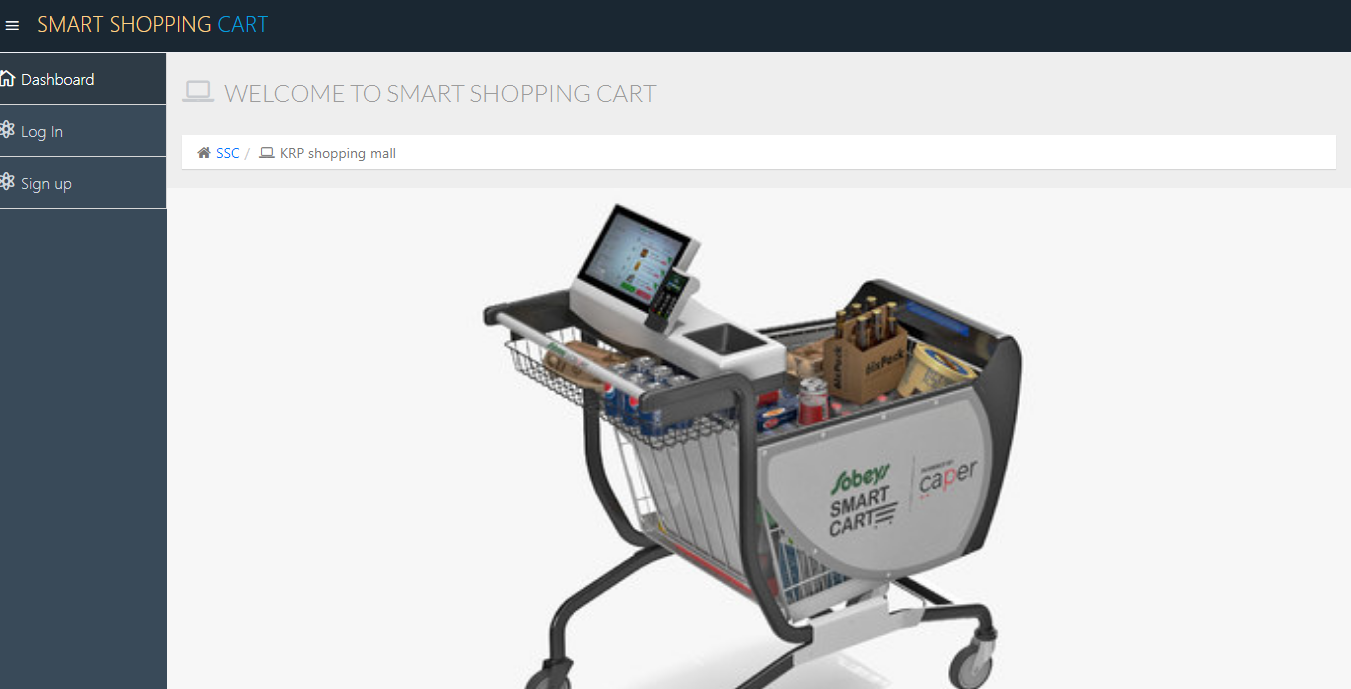
Welcome interface
In the admin and staff section
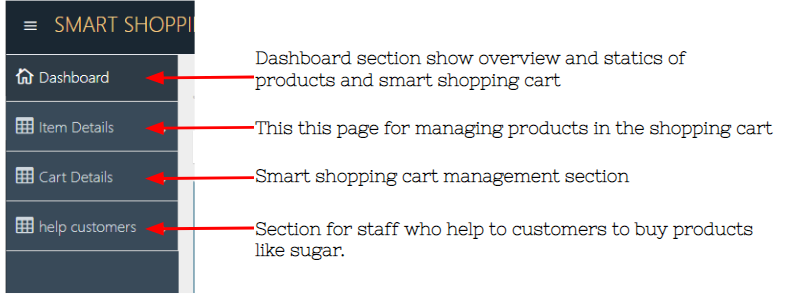
- Product section
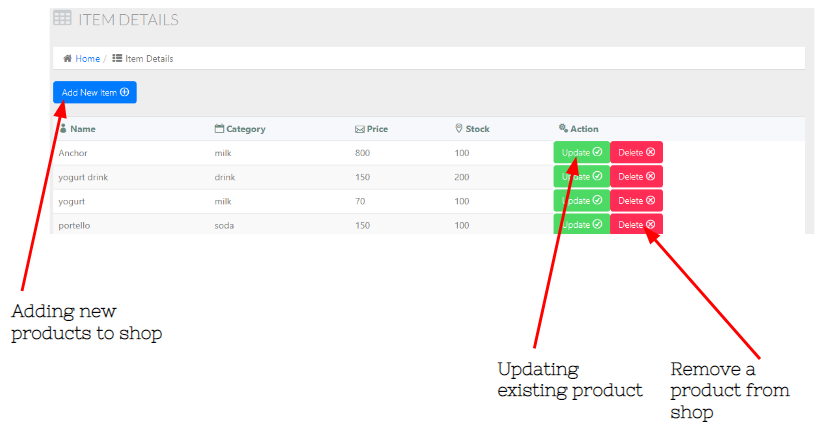
Item Details section
In the items, details section staff or admin can add, update, and remove the products.
After clicking the add new items button window expand like this
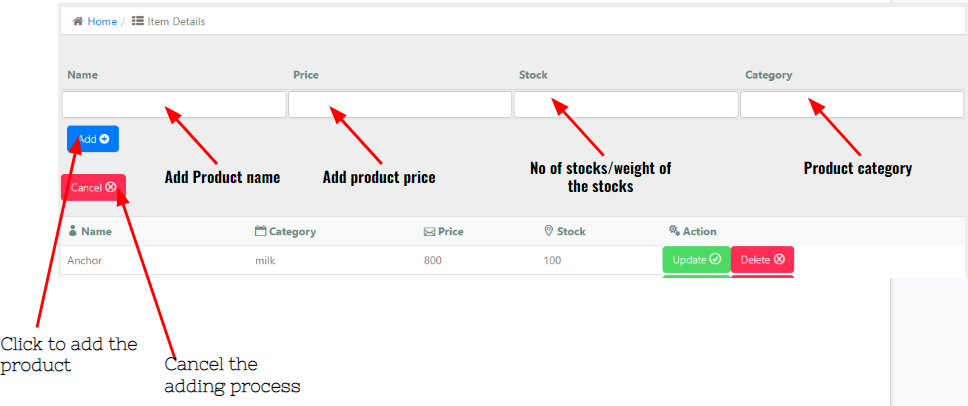
Using the expanded form, admin/staff are able to add new items.
- Cart section
Using the cart section the web application admin is able to add, remove, and generate a QR code for the cart and also be able to make a printout of that QR code.
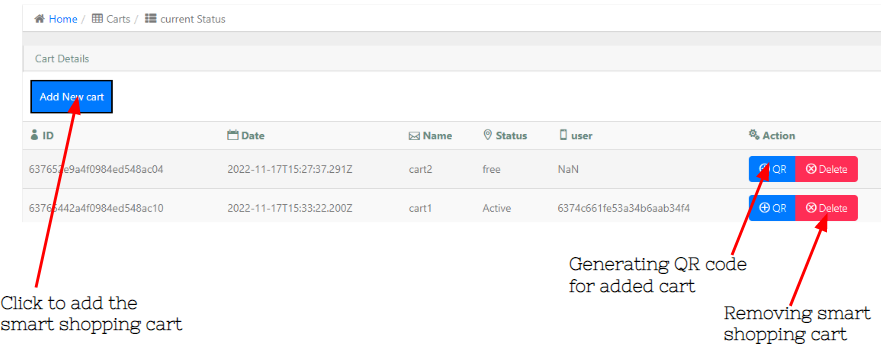
Cart managing section
When the user clicks the add new cart button it expands and show a form for adding the cart name
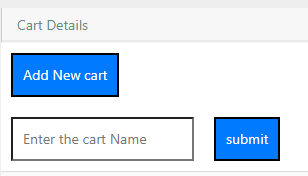
Using this form, the admin is able to add a new cart to the shop.
When clicking the QR button it will generate the QR code for the specific cart and also be able to print out it.
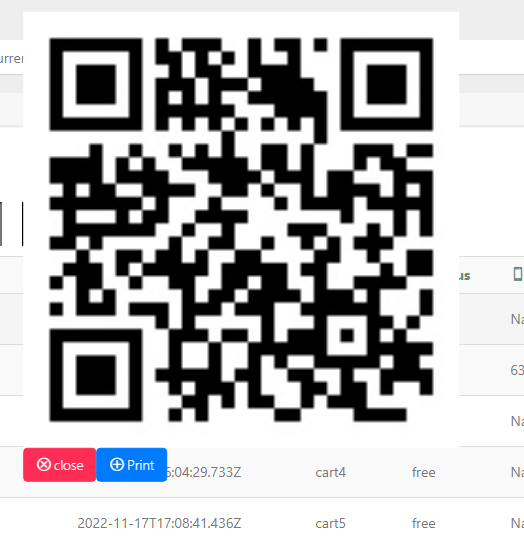
Sample QR code for a cart
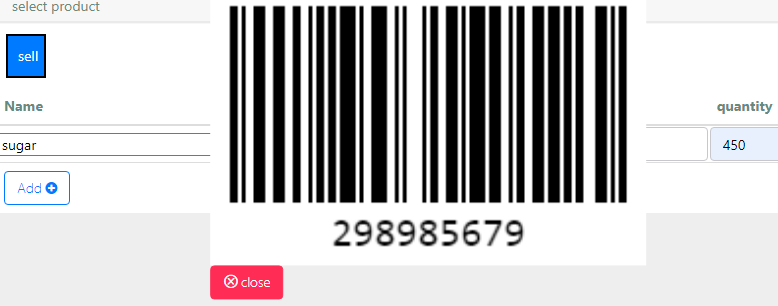
- Helping customers
This section is used by staff for helping customers who like to purchase items like sugar. Here staff has to pack the items and enter the product name, price and weight of the product and be able to generate the barcode. After scanning the barcode, the customer can then add the item to their shopping basket.
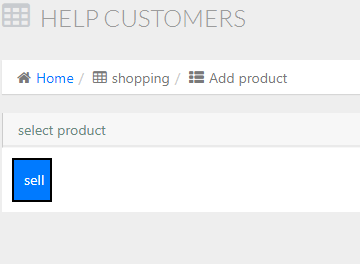
For generating a barcode for a product you have to click the sell button first. A new form section will then be displayed, as shown below.

Staff members can choose the product using this form. The price section automatically updates from the database when the product is chosen. The quantity of the product must then be mentioned by the employees. Then, by selecting the add option, staff can create barcodes. Now, the display appears as follows.